Animation Project: Photography Alphabet Review

alphabetbw alphabetcolour

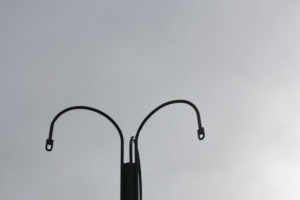
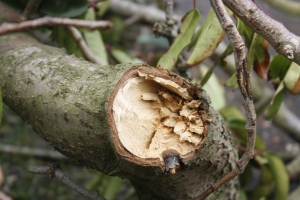
Here is montages of the full alphabet. I found that putting the letters into black and white helps some of the forms be shown more clearly, as there are distracting colours in some of them, however others become more obscure. However unfortunately this makes the letter S stand out far more as the letter is formed using a white tone rather than a black or a grey.

If I were to do this project again I would visit more locations, such as a city, as there would be a wider range of structures to photograph. One area I could explore would be using a theme to tie the photographs together.

type the sky

Type the Sky by Lisa Rienermann

An example of this would be this semester project by typography student Lisa Rienermann. She uses the negative space in-between buildings to form the letterforms which is effective as the sky gives a commonality of tone through the photographs. The forms are also quite similar, being all very geometric as a result of man-made architecture.

Adapting this premise for my own work I would like to explore finding letter forms formed by lines and negative space from trees. I think that some of these pictures are the most effective in my original work and exploring this further would be rewarding.

A downside to recreate a project like this is that it would be very time consuming, as well as nigh impossible to find all the letterforms. Rienermann admits herself that some images were Photoshopped in order to create the more challenging letterforms. It would also be useful to explore more locations to fully explore the concept, a visit to the New Forest would be ideal.

Interview with Lisa Rienermann to be found here:

Boris., 2007.  Type the sky / Semesterarbeit von Lisa Rienermann, Uni Duisburg-Essen [Accessed online] Available from: http://www.slanted.de/node/1361 [Accessed 27.2.14]
Animation Project: Alphabet Photography

mol

Working together with Luke Monet we managed to find forms that represented the whole alphabet. This project was quite challenging as some letter forms were hard to find naturally, such as the letter G. I think this is because of the mix of curved and straight lines in some letters, and the particular way they are arranged, which makes it unlikely that manmade (which are usually purely geometric) or organic (which are usually more curved) structures will form them naturally. Some of the most effective photographs were ones that had delicacy in the lines, such as those made by lamp posts and telephone wires and those made by organic forms such as trees.

Some photographs also didn’t tun out quite as well as I had liked, one of my main problems was that I was unfamiliar with the camera (I had rented a DSLR from the university as I do not own one myself). Although I found focusing far easier than with my point and click, I was unable to adjust the white balance and aperture properly which did not give me as much control as I would have liked.

Animation Project: Alphabet Photography Initial ideas

The next assignment for the animation project was to create a photograph alphabet using forms found naturally in the environment. I thought the best way to approach this project would be to go on a series of long walks to find the letterforms. As I would like to find the whole alphabet I think that going to a variety of different locations would be very helpful. Some places that I have in mind are Meyrick Park, a heavily wooded area, and Charminster High Street which is more urban, in order to get a range of different environments.

Animation Project: Reading on Drawing

To help further my animation work, I decided to look at some books on art theory and drawing techniques to help further my craft.

One book that was particularly helpful to me was Seegmiller’s Digital Character Design and Painting. It illustrates the process of creating digital characters using a foundation drawn from traditional art techniques. It has been very helpful in explaining in detail complex concepts such as colour theory, lighting and value in an image which previously had not been explained properly to me.

Another book I found useful was The Art of Animal Drawing by Ken Hultgreen, which furthered my knowledge of animal anatomy and ways to express movement in animals through drawings. I found the notes on building the form of animals and the lines and arcs made through their movements particularly useful and will be helpful in my further animation work. The caricature references were also very useful in formalising designs for my character and finding ways to express emotion and personality through this.

Seegmiller, D., 2003. Digital Character Design and Painting. Massachusetts: Charles River Media, Inc.

Hultgreen. K., 1993. The Art of Animal Drawing: Construction, Action Analysis, Caricature. London: Pittman

Animation Project: 35mm Experimentation

http://dakar.bournemouth.ac.uk/~sperkins/35mm/2013/docs/libby.swf

After studying McLaren’s work I began to do some animations for my project. I wrote a 15 second piece for the animation. I didn’t want it to be too complicated, so it is mainly running arpeggios on the piano mixed with some dissonant chords at the end. I chose to use a piano to refer to Boogie Doodle. I also added a cymbal for dramatic effect at the end as otherwise the chords sound quite “bare”.

This is my first experiment animating a “35mm” film. I tried to animate the movement in time with the music, however using Flash it is hard to be precise and I can still see some errors. As I was working with a tablet, animating “scribbles” was very quick to do and allowed me to play with movement, however looking back I should have used some more shapes of flat colours.

I would like to continue experimenting, using the same piece of music to see what other animations I can come up with. I will probably try more colour variations as well as playing with form with a bit more.

Animation Project: 35mm Animation Experiment Initial Thoughts

Screen Shot 2014-02-18 at 13.59.58

flashtest

colour test

Our next assignment for this project was to produce a 15 second animation. We were to make our own music for this project and then produce visuals using a 22mm by 16mm space because although the animations would be made using Flash, the format would be mimicking 35mm film.

Above are some of my first experiments. I was experimenting with colour and form. I wanted to mimic organic forms, so pulled apart the preset shapes using the pen tool. The colours are me experimenting with different contrasts. Initially I played with blue and pink, however I now feel that they were too bold and the use of varying shades of orange on charcoal grey were more effective.

For inspiration I looked at Norman McLaren’s Boogie Doodle, and I played with the colour scheme he used, mainly complementary colours orange and blue. The effectiveness of this animation comes from the timing, the music is tied to the rhythm of the music. Movement of the “camera” is created by animating lines that move into and out of the sides of the frame. This works particularly well as the movement is tied to the bars of the music. Also during the chord progressions the foreground and background colours switch position, giving a clear visual cue that ties into the different mood of the music.

McLaren, N., 1948. Boogie Doodle [video, online]. Available from: http://www.youtube.com/watch?v=TgJ-yOhpYIM [retrieved 21.2.14]

Animation Project: Spinner Scope Review

head

This is a gif of the animation on the spinner scope strip. Although ideally it should be viewed on the device itself, taking pictures of the frames and merging them together in a gif allows the drawings to be seen clearly in a digital format.

I am quite pleased with the result of the experiment as I think the dog clearly shows a “cheeky” expression which was one of my main aims in this experimentation. I find the movement of the tongue and eyes particularly effective as they are quite fluid and clearly express the movement to be shown.

If I did this again I would probably synchronise the movement of the ears as the asynchronous movement looks quite unnatural. I would also add more squash and stretch to the neck of the dog to emphasise the head bobbing movement as it is not that clear in the animation. The muzzle of the dog could also have been more pronounced in order to give it a more realistic look and make it easier to see what animal it is. In future experiments form this animation I would like to experiment with walk cycles to further my understanding of animal movement and character design.

Animation Project: Spinner Scope Hand Drawn Animation

Image

ImageImage

To begin the spinner scope animation project I first drew some initial designs in my notebook. I decided to draw a dog wearing headphones and bobbing his head to the music as it was quite a fun idea I had and I wanted to keep this project quite lighthearted. Through drawing in my notebook I figured out the movement through the frames and how the dog’s head and neck will tilt and move as it cocks it’s head side to side. Drawing also let me explore the facial features of the dog. I decided to base the design on a Shiba Inu as this breed can have quite expressive facial features yet are quite simple structurally.

_MG_1502_MG_1501

Whilst drawing the strip I decided to add more expression to the character by adding floppy ears and a wagging tongue. With the winking eyes, it helps give the dog a “cheeky” persona and adds a bit of an edge to the character. I found it hard drawing frames that line up without being able to see the frame underneath (this is usually achieved when animating by using pegs and a light box for drawn animation or “onion skinning” in digital animation.

After sketching the frames I decided to colour them using watercolour pencils as they do not give overly saturated colours which are quite naturalistic. I then decided to ink over the drawings to give a greater definition to the lines. I also inked over the headphones in order to make them stand out more in the drawing and give contrast to the organic form of the dog.

Animation Project: Spinnerscope Initial Ideas

The next project I was given from my course was a series of experimental animation projects to be done each week. The first of these was a task to create a 12 frame animation for a spinner scope.

spinnerscope

A spinner scope is a children’s toy based off of a praxinoscope. The praxinoscope is an invention that uses the (now discredited, the actual method of seeing moving images from stills show in rapid succession is the phi phenomenon) theory of persistence of vision to create the illusion of movement.

For inspiration I looked at some films that featured anthropomorphised animals as I would like to explore this area of animation. Animating animals is a complicated and challenging process, which makes it a rewarding experience. It requires the use of many different drawing and timing techniques to be effective.

These techniques can be simplified as the 12 basic principles of animation as detailed by Johnson and Thomas in the book the Illusion of Life. They include concepts such as squashing and stretching of a body to create the sense of a fixed volume and the use of arcs in motion, as most movements naturally follow this trajectory.

http://www.youtube.com/watch?v=ji-LqBskNyE

One of my favourite films from my childhood was Watership down. I think what pulled me to this film was the character design. Although the characters still retained some “cartoony” elements the anatomy and animation of the rabbits (see how they run for an example) also retained a lot of true to life features when you compare it with other styles of animal animation.

I would like to explore these ideas by creating an animation of animal movement for the spinner scope.

Johnston, O,. and Thomas. F., 1981. Disney Animation:The Illusion of Life. New York: Abbeville Press.

UmbrellaEntAU. Watership Down trailer Available from: http://www.youtube.com/watch?v=ji-LqBskNyE [Accessed 20.2.2014]

Learning how to use Arduino

Our course recently ordered some new hardware for us to learn  and play around with. One of these is the Arduino, an open source platform used for prototyping electronics.

The only experince I have had with electronics is during high school physics lessons and they were mainly simple circuits, so I thought it would be useful to learn a bit more about this for future projects. To begin learning how to use the Arduino I followed a tutorial on making an LED light first blink, then blink faster when a button is pressed.

Here is the code I used:

Arduino1

The arduino uses inputs and output ports. This code sets the LED to an output and the button as an input. A loop cycle is created where power is sent to the LED, the loop is delayed for a period of time (leaving the light on), then no power is sent to the LED (turning the light off). If the button is pressed the time of the delay is shorter, making the blinking faster.

Here is a video.

I then tried out my own extention of this code. It’s very simple but it helped me to understand and cement the basics, especially of the concepts of ports, in my mind. This time the LED I attached to the breadboard lights up when the button is pressed and turns off when it is not pressed.

Here’s the code:

Arduino2

And here’s the video:

Here’s a link to the website of the Arduino Project.

http://arduino.cc/